Quality Drainage Scoria used in construction

20mm-Drainage-Scoria-Kennedys-Garden-Supplies


Whether you’re in construction, landscaping, or plumbing, drainage scoria is a versatile material that can add value and functionality to your projects.

Kennedys Cranbourne stocks quality drainage scoria used in construction.

This includes the 20mm and 7mm sizes to suit various applications.


Here are ways to use quality drainage scoria in construction.


1. Drainage Solutions:

Due to its porous nature, drainage scoria creates efficient drainage systems.

Its lightweight structure allows for easy water flow, preventing waterlogging and managing runoff effectively.

This type of volcanic rock is ideal for French drains, trench drains, and other drainage applications.


2. Plumbing Support:

For plumbing projects, scoria can be used to around pipes, this ensures stability and aiding in water drainage around plumbing installations.

It minimizes moisture retention, reducing the risk of corrosion over time.

3. Retaining Wall Backfill with scoria:

When constructing retaining walls, use scoria as backfill material provides excellent drainage, reducing excessive pressure.

This can increase the life of the retaining wall and prevent damage from water build up.

retaining wall
retaining wall

4. Scoria in Decorative Garden Beds:

Beyond its functional use, scoria also adds aesthetic value to garden beds.

Its natural, earthy appearance complements landscaping designs beautifully and helps retain soil moisture while allowing for excellent drainage, which is beneficial for plant health.

The 7mm drainage scoria is popular for use as a hard mulch in garden beds.

scoria as mulch in garden bed

5: Scoria as a Fill material

20mm Scoria can be used as fill material construction projects. It is lighter than gravel so it can be easier to transport.


6: Drainage Scoria in Aquaponics and Hydroponics

Scoria can retain moisture while allowing excess water to drain away. It makes it an ideal material for indoor gardening systems.

With options available in both 20mm and 7mm sizes, you can select the right dimension that suits your specific needs.


Reach out to us to get your supply and enhance the efficiency and aesthetics of your projects today.

Call 03 5996 2504 for more information

Crushed Rock in Construction

Crushed rock

Construction and building projects use crushed rock for stability and durability.

The drainage and compacting qualities of Crushed Rock make it a material that is used for both wet weather conditions as a sub-base.

This article explores the benefits of using crushed rock in these contexts.


Crushed rock is produced by mechanically breaking down larger rocks into smaller aggregate stones which include fines.

The stone varies in size, shape, and texture, making crushed rock an excellent choice for various construction applications.

Crushed rock is made from hard rock types, including granite, basalt, and limestone and these contribute to its strength and durability.


Benefits of Crushed Rock in Wet Weather

Crushed Rock in Wheel Barrow

1: Firm Base Properties

One of the primary advantages of crushed rock as a firm base.

Crushed rock compacts well allowing a strong and stable sub base for concrete or decorative driveway toppings to be applied.

2: Minimised Erosion:

Most important, soil erosion can become a significant concern in wet weather.

Finally, crushed rock provides a stable surface that helps prevent soil displacement, making it ideal for driveways, paths, and other outdoor areas that are prone to water runoff.

3: Reduced Slipping Hazards:

Wet surfaces can become slippery and hazardous.

Crushed rock provides a natural traction this making it a safer option for areas subjected to heavy rainfall.


Crushed Rock as a Sub Base Material in Construction

crushed rock in construction

The sub-base is a foundational layer beneath paving or structures, and using crushed rock in this capacity offers special advantages:

1: Load Distribution in construction

Laying crushed rock can distribute weight, making it a reliable choice for supporting heavy constructions, such as roads, parking lots, and building foundations.

The quality will help prevent settling or cracking over time.

2: Compaction and Stability:

In conclusion, Crushed rock forms a solid foundation and resists movement when compacted.

The compaction will ensure the longevity of the structure built on top.

Its angular particles and finer dust will lock together to provide added stability.

3: Versatility of crushed rock:

Crushed rock is versatile as it can be used for residential driveways and commercial building foundations.

On the other hand, its adaptability makes it a go-to option for contractors.

4: Cost Effectiveness:

Compared to other materials, crushed rock is often more affordable and provides excellent value without compromising on quality or durability.


Conclusion

Equally important, incorporating crushed rock into construction or building projects in wet weather conditions can offer numerous benefits.

Previously mentioned, its drainage properties, erosion resistance and stability as a sub-base makes it an invaluable resource for ensuring the longevity of structures.

Whether you’re building a new road, laying down a foundation, or enhancing outdoor spaces, crushed rock is a smart choice that combines practicality with performance.

Finally, by selecting the right crushed rock, you can achieve optimal results to make informed decisions on durable construction.

For deliveries of Crushed Rock in Berwick, Cranbourne, Clyde, Skye or Botanic Ridge, call Kennedys Cranbourne on 03 5996 2504

How to Lay Paving with Concrete Sand or Blue Stone Dust

how to lay pavers with bluestone dust or concrete sand

When it comes to paving, both concrete sand and blue stone dust are excellent choices due to their coarse texture, which prevents moisture from becoming trapped between pavers and ensures a solid foundation.

Here is a step-by-step guide on how to use either Concrete Sand or Blue Stone Dust to lay pavers.

DIG OUT THE AREA before pavingDIG OUT THE AREA before pavingDIG OUT THE AREA before pavingHere’s a written guide to get you started:

1. Prepare the area:

Start by clearing the area of any debris and vegetation.

PREPARE SITE OF DEBRIS before laying pavers with blue stone dust or concrete sand

2. Excavate the area:

Dig out the area to a depth that allows for the pavers, bedding layer, and sand to sit at the desired height.

3. Add base material:

Lay down a base material like B Grade crushed rock, gently spray with water to reduce dust and compact it with a plate compactor to create a stable foundation for the pavers.

4. Add a layer of sand or dust:

Spread a layer of either concrete sand or blue stone dust evenly over the compacted base material as a base to lay the pavers the pavers.

The sand or stone dust should be screeded, or levelled, to ensure a consistent depth.

5. Install edge restraints:

Place edge restraints around the perimeter of the area as this will keep the pavers in place.

6. Lay the pavers:

Start laying the pavers in the desired pattern, ensuring they fit closely together.

7. Compact the pavers:

Once all the pavers are laid, use a rubber mallet to firmly compact the pavers into the sand or stone dust.

8. Fill the joints:

Finally, spread a finer white washed sand over the pavers and use a broom to sweep the sand into the joints between the pavers. Then, lightly wet the area to help settle the sand.

This is a basic overview, but there are many factors to consider when laying pavers.

If you need more specific guidance or want further details on any of these steps, feel free to ask.


How to Create a Pathway with Pebbles using Weed mat

create a pathway with weed mat as base

Create a pathway using weedmat and pebbles

One of the projects that you can undertake to transform your outdoor space quickly and easily with how to create a pathway with pebbles using weedmat. Here is a step by step guide on how to create a pathway using weed mat and pebbles. How you can achieve a functional and visually appealing pathway through out your garden or yard.

Step 1: Prepare the area you need to leave clear.

Firstly, prepare the intended area of the pathway. Dig out the area to a depth of  about 10 cm, which is enough room for the base layers and pebbles while maintaining the ground level.

Step 2: Lay a firm Base.

Afterward digging out the area, you need to establish a firm base for the pathway. Then spread the crushed rock evenly on the cleared out area and level it with a compacting tool like a roller, as this ensures a firm base and even distribution. Add the bluestone dust on top of the rock to a depth of  5 cm as it will give a smoother surface. Bluestone dust is more compact and smooth and will provide an ideal surface for the weed mat.

Step 3: Create a pathway using Weed Mat

The next phase is laying the weed-mat. Spread the weed mat over the compacted base as the weed mat provides several functions. This includes preventing the growth of weeds underneath and adding strength to the pathway. Ensure that the weed mat covers the entire area of the pebbles.

Step 4: Add the Pathway Toppings or Pebbles

Finally, you are ready to lay down the pebbles which is the final layer of your pathway. Spread a 5-10cm deep layer of small pebbles or pathway toppings on top of the weed mat for a good coverage. The thickness varies with the size of the pebbles. Use a rake to spread the pebble uniformly across the path and smooth the appearance.

Step 5: Maintenance

After the pathway is complete, you should ensure that the pathway is well maintained. Clear the surface of dirt and leaves to ensure that  it remains glamorous. Check the weed mat for any signs of weed growth and remove the weeds to avoid any holes in the mat.

With the above steps, you will have a beautiful pathway with pebbles. This step by step guide will help you create a pathway with pebbles with weed mat. Resulting in a viable solution for your landscaping project.

Alternatively, call the team at Kennedys Cranbourne if in the City of Casey or surrounding suburbs.
For further information, you can call us or look at our products pages for pricing.

You are now ready to create a pathway with pebbles using weed mat!

Unlock the Power of Compost:

Tips & Benefits to Compost

10 Active Ways to Enhance Your Garden and Environment.

Unlocking the power of compost.
Firstly, compost is a highly versatile and beneficial resource which can be applied in many ways to enrich your soil, environment and the health of your garden.

Here is a guide to unlocking the power of compost.

1. Fertilise your Garden 

To begin, add the nutrient dense compost in your wheelbarrow to fertilise your garden. This provides your plants with the essential organic materials to feed the soil. Then spread a thick layer of compost on the soil around your plants to support vigorous and healthy growth.

Fertislise you Garden. Compost in wheelbarrow

2. Mulch for Moisture Retention:

Secondly, use compost as a mulch as this will help retain moisture in the soil. This activity saves water usage and also saves the roots from the lethal low and high temperatures.

3. Create Compost Tea:

Next, add water to compost to make a liquid fertiliser. This watery fertiliser can be used in the growing season regularly in vegetable gardens.

4. Improve Soil Structure:

Afterwards, mix compost into your garden soil to improve its structure and water retention capacity. As a result this will help loosen heavy clay soils and provide better aeration for plant roots.

Improving soil structure with compost

5. Amend Potting Mixes:

Additionally, compost combined with your potting mix to improve your potted plants with nutrition and a better growing environment

6. Feed Your Lawn:

Spread layers of compost to feed your grass with the right nutrients and make it lush.

Turf sand, soil or compost for top dressing

7. Boost Compost Bins:

Making a compost pile with the fully developed compost will kick start new compost piles. This provides various forms of micro organisms for working with the compost pallet.

8. Repel Pests and Diseases:

Some research suggests that using compost as a top dressing around plants will help deter certain pests and diseases because of  its rich microbial community.

9. Utilisation of Compost for Erosion Control:

Use compost to help control erosion on slopes or bare areas by stabilising the soil and promoting healthy plant growth and deter weed growth.

10. Support Sustainable Living:

By using compost, you are participating in sustainable waste management, reducing your ecological footprint, and returning organic matter back to the earth.

In conclusion, compost is a valuable resource with numerous benefits for gardening, landscaping, and environmental stewardship. Our Diggers compost is the perfect example of high quality, nutrient rich compost available at Kennedys Cranbourne.

Embrace the active use of compost in your everyday life to enhance the health and vibrancy of your plants and contribute to a more sustainable world.

See our range of composts and mulch here. https://kennedys.net.au/product-category/mulch/

From Waste to Wealth: A Beginners Guide to Composting

Composting Kitchen Scraps with Compost Creation tips

Composting your garden waste at home is a fantastic way to reduce waste and create nutrient-rich soil for your garden. Here’s a simple beginners guide to compost creation tips to get you started:

1. Choose a composting method:

There are various ways to compost, including using a bin or setting up a compost pile in your yard. Select a method that suits your space and needs.

2. Collect organic material:

Firstly gather kitchen scraps like fruit and vegetable peels, coffee grounds, and eggshells. Also, collect yard waste such as grass clippings, leaves, and small branches. Avoid adding meat, dairy, and oily foods to your compost.

3. Layer your compost:

Alternate layers of green (nitrogen-rich) and brown (carbon-rich) materials. Green materials can include kitchen scraps and grass clippings, while brown materials can be dry leaves, straw, or shredded paper.

4. Add water and air:

Moisture and aeration are crucial for the composting process. Ensure your compost pile is damp, like a wrung -out sponge, and turn it occasionally to provide oxygen to the microorganisms breaking down the material.Composting Kitchen Scraps with Compost Creation tips

5. Let it decompose:

Depending on the method and conditions, composting can take a few months to a year. Keep an eye on the moisture level and turn the compost because this will aid decomposition.

6. Use your compost:

Once the compost turns dark and crumbly, it’s ready to use in your garden. Spread it around your plants or mix it into the soil as its improves soil fertility.

Tips & Benefits to Compost

7. Compost creation tips

Remember, the key to successful composting is maintaining a balance of organic materials, moisture, and aeration.

Happy composting with these compost creations tips!

Kennedys supply fresh nutrient rich compost which is readily available for your garden projects now. Composts you can choose from are either Diggers Compost or Mushroom Compost.

If you have any specific questions, feel free to ask. See video on YouTube here.

Exploring the Difference Between Screened Top Soil and Super Blend Top Soil

Super Blend Top Soil from Kennedys Cranbourne Garden Supplies

Introduction:

When it comes to gardening and landscaping, the quality of your topsoil plays a crucial role in the success of your plants. At Kennedy’s Cranbourne landscape garden centre, you can choose between two excellent options.  Screened Top Soil and Super Blend Top Soil.  In this blog, we will explore the differences between these two products and their specific applications.

Screened Top Soil:

Screened Top Soil is a sandy loam topsoil that is suitable for a wide range of gardening jobs.  It has been carefully screened to remove any large debris, with a finer, consistent texture. This makes it ideal for seeding lawns or laying fresh turf. The sandy loam composition promotes healthy root growth and efficient drainage and helps plants to thrive.

Screened top soil at Kennedys Cranbourne

Super Blend Top Soil:

On the other hand, the Super Blend Top Soil contains aged fowl manure and sawdust. The ingredients provide a rich source of nutrients. It is high in essential elements like nitrogen, potassium, calcium, and phosphorus. This nutrient-rich composition makes it an excellent choice for fertilising and conditioning your garden beds. It is important to note that the Super Blend Top Soil is not suitable for use around Australian native plants that have specific nutrient requirements.

Super Blend Top Soil from Kennedys Cranbourne Garden Supplies

Applications and Considerations:

1. Screened Top Soil:  Use this versatile topsoil for various garden applications. It is perfect for seeding lawns or establishing new turf. Its well-draining properties make it suitable for container gardening as well. When using the Screened Top Soil, be sure to monitor the moisture levels to ensure optimal plant health.

2. Super Blend Top Soil:  With its high nutrient content, the Super Blend Top Soil is an excellent choice for enriching your garden beds. It can be used to improve soil structure and fertility, providing a boost for your plants. However, it is important to be mindful of the specific needs of your plant species. Australian native plants, for example, are adapted to low-nutrient soils and may suffer if exposed to excessive nitrogen or phosphorus.

Choosing the Right Top Soil: Selecting the appropriate topsoil for your garden depends on your specific gardening goals and the plant species you are cultivating. If you are looking to establish a new lawn or need a general-purpose topsoil, the Screened Top Soil would be an excellent choice. On the other hand, if you are seeking to enhance the nutrient content in your garden beds or containers, the Super Blend Top Soil can provide the necessary boost.

Conclusion: Kennedy’s Cranbourne landscape garden centre offers two fantastic options for gardeners: Screened Top Soil and Super Blend Top Soil. The screened topsoil is perfect for seeding lawns and general garden applications, while the Super Blend Top Soil provides a nutrient-rich solution for enriching garden beds. By understanding the differences between these two topsoil options, you can make an informed decision and ensure the success of your gardening endeavours.

Drop into our Cranbourne East yard or organise local delivery to Clyde, Berwick, Cranbourne and other local suburbs.

Garden decor to enhance your outdoor space

Mira Blue Glazed OutdoorWater Bowl stocked at Kennedys Cranbourne garden supplies

At Kennedys Cranbourne landscape garden centre, you will find a diverse range of outdoor décor in water bowls, bird feeders, and garden pots that cater to different styles and preferences. Here are some of the options available:

1. Baby Old Stone Bird Bath:

Firstly bird bath provides a charming addition to your garden which attracts birds and adds a decorative touch.

2. Water bowl:

Next a simple yet elegant blue glazed terracotta water bowl that can be used for birds or as a standalone water feature.

Mira Blue Glazed OutdoorWater Bowl

3. Avian Hutch and Ball:

Likewise, these unique bird feeders doubles as a hanging ornament, providing a stylish way to attract birds to your garden.

terracotta avian hutch and ball bird feeders + house

4. Torquay Tub:

For a rustic tub option that can be used as a garden pot or as a water feature, perfect for adding a natural touch to your outdoor space.

5. Shoal Tub:

This sleek and modern tub design adds a contemporary feel to your garden, suitable for both plants and as a water feature.

6. Astra Tub:

A versatile garden pot that comes in various sizes and colours, allowing you to create stunning displays of plants or even use it as a standalone ornament.

7. Bella Tub:

Elegant and timeless design, this tub is ideal for creating a focal point in your garden or for showcasing your favourite plants.

Additionally the Bella tub is available in Turquoise or Pink

8. Pastello Egg:

Uniquely shaped garden pot adds a playful and whimsical touch, perfect for adding a pop of colour to your outdoor space.

See the Pastello Egg pots here:

9. Sandstone Cylinder Garden Decor:

Also a traditional sandstone pot that complements a variety of garden styles, adding a touch of sophistication to any setting.

10. Seasons Egg

Meanwhile this egg-shaped garden pot is perfect for showcasing your seasonal plants and flowers, providing an eye-catching display throughout the year.

11. Garden Decor Seasons Tub:

Equally Similar to the Seasons Egg, this tub-shaped pot offers versatility and style. The Seasons range allows you to create stunning arrangements in your garden.

Seasons Tub flower pot at kennedys c

Kennedys Cranbourne landscape garden centre is conveniently located for pick-up if you live in Clyde North, Berwick, Cranbourne, or Botanic Ridge.

We have wide range of water bowls, bird feeders, garden pots and other garden décor.  You will surely find the perfect additions to enhance your outdoor space.
Prices are on our website. Drop in to our yard at 1635 South Gippsland Highway in Cranbourne East, VIC

Why use Mulch and which is the best mulch to use

The best mulch to use

What is Mulch

Mulch is an essential component for maintaining a healthy garden. The information below will help you to understand the importance of using mulch and which mulch to use for your garden. It is a layer of organic or inorganic materials placed on top of the soil to help. Below is a list of benefits of why use mulch.

1: retain moisture,

2: suppress weed growth,

3: regulate soil temperature,

4: improve soil fertility and

5: Helps prevent soil erosion and erosion damage to plant roots.

Nutrients are added to the soil when organic mulches such as leaves, grass clippings, and bark decompose. This is important as it provides a natural fertiliser for the plants.

Inorganic mulches such as wood, stone or plastic can also provide benefits such as preventing moisture loss and weed growth.

Applying mulch to your garden not only improves the appearance of your landscape but also helps to promote healthy plants.

When it comes to choosing the right mulch for your garden, there are three main categories of mulch to consider.

The categories are feeding, wood and hard mulch.  See descriptions below for each  of these types to help you decide which is best to use in your garden.

a: Feeding Mulch

Pea-straw, Sugarcane and lucerne are both effective and popular options for organic types of cover in gardens.

Pea straw is known for its high nitrogen content, while Lucerne has high levels of potassium and phosphorus and Sugar cane breaks down to provide hummus to the soil, making them all great choices to improve soil fertility and an important mulch to promote plant growth.

b: Wood & Bark Chips

Wood chip and bark mulch are common types of inorganic types used in gardens and landscaping. They are made from chipped or shredded woody material such as wood chips, bark, and shredded sawdust.

These types are highly effective in suppressing weed growth and conserving soil moisture while providing an attractive ground cover. The larger size of the mulch pieces also means that they break down slowly over time, making them an excellent option for gardeners who prefer a low-maintenance solution.

However, it is important to use a mulch that is appropriate for your specific plant needs since some wood chip and bark chips can be quite acidic and negatively affect soil ph. It is best to source your mulch from landscape supply companies as they stock quality products.

c: Hardscaping

Hard layers are an inorganic type of mulch made from materials such as rocks, pebbles, and gravel. It is a long-lasting option for gardeners who prefer a low-maintenance solution, as it does not require frequent replacement.

Hard stone is also beneficial for making garden paths and driveways, providing effective weed suppression while adding an attractive and decorative element to a garden landscape.

However, hard layers can be difficult to remove and work with than organic types and do not contribute to soil fertility. Furthermore, it can reflect heat and cause plant stress on hot days

Conclusion

Each type has its own unique benefits and drawbacks, so it’s important to consider factors like the growing conditions in your area, your budget, and your personal preferences when making your selection.

Ultimately, the right choice can help keep your plants healthy and thriving, while also enhancing the overall aesthetic appeal of your outdoor spaces.

See our YouTube channel

Garden ideas

Backyard Landscaping Ideas for your Garden

Backyard Landscaping Ideas

Backyard Landscaping

Backyard landscaping is an excellent way to transform your outdoor space into something beautiful that reflects your personality and style. Whether you have a small, cozy backyard or a large, sprawling garden, there are plenty of landscaping ideas to make it your own. Here are a few ideas from building a deck, water feature or hardscaping to get you started.


1: Create a Garden:

One easy way to beautify your backyard is to create a garden. From flower beds to vegetable gardens, there are numerous options to choose from. You can add a few raised garden beds and grow your own fresh herbs and vegetables or plant some beautiful flowers to create a colorful and fragrant haven.


2: Build a Deck or Patio:

Adding a deck or patio to your backyard not only enhances the visual appeal but also provides an excellent space to relax and entertain guests. You can create seating areas, dining zones, and even add a built-in fire pit.


3: Install a Water Feature:

Whether you want to create a peaceful ambience or add a focal point to your backyard, a water feature can do the trick. A small pond, a fountain, bird bath, or even a waterfall can make a striking addition to your backyard.


4: Add Lighting:

Lighting is simple yet effective in transforming your outdoor space. String lights, lanterns, and spotlights can all be used to create a cozy and inviting atmosphere.


5: Incorporate Hardscaping:

Lastly, hardscaping elements like stone walls, pavers, and pathways can add texture and contrast to your backyard. They also provide a sturdy foundation for your furniture and plantings.


These backyard landscaping ideas are just a starting point for the endless possibilities that exist for creating a beautiful outdoor oasis right in your own backyard. You can mix and match these techniques until you have a custom solution that is perfect for your needs.

via GIPHY

Call the friendly staff at Kennedy’s or search our website for more information


Cath

The Benefits of Composting in Autumn

Fertislise you Garden. Compost in wheelbarrow

Composting is an age-old method of recycling organic materials.  Natural materials such as leaves, kitchen scraps, and yard trimmings. This will turn into a nutrient-rich soil amendment that can be used to enhance your garden soils. Composting in autumn has many benefits. Cooler temperatures are ideal for producing quality compost. Autumn is also a great time to start composting. Plenty of fall foliage and other plant material is available to use in your compost pile.

Advantages of Composting in Autumn

Advantages of composting in autumn as the cooler temperatures are ideal for producing quality compost. The microorganisms that break down organic material – like bacteria and fungi – love the cooler temperature. They thrive in temperatures ranging from 12-25 degrees C. Which makes autumn an optimal time for successful composting.

Additionally, cool weather means slower decomposition. More oxygen can reach the microbes, resulting in higher quality compost with rich nutrients.

Having plenty of fall foliage and other plant material available as feedstock for your pile is another advantage to composting during autumn months. Autumn leaves are especially abundant this time of year.  They contain a high level of carbon which is necessary ingredient when creating a balanced mix in your compost bin or pile. Other materials such as grass clippings and vegetable scraps can also be added.  This ill increase nitrogen levels needed for successful decomposition.

via GIPHY

Creating the Perfect Compost Pile

The key to making quality compost is to ensure you are using the right materials in your pile and blending them in a balanced manner. When it comes to creating compost, there are two types of material that should be used. “Green” (nitrogen rich) materials such as kitchen scraps or grass clippings, and “Brown” (carbon rich) materials like leaves or wood chips. Both green and brown components should be added in equal parts for optimal decomposition. Too much of one type can inhibit microbial activity and slow down the breakdown process.

Ensuring you have enough nitrogen-rich material is also essential when creating a successful compost pile. For every 2 parts of carbon-rich material, add 1 part nitrogen-rich material such as food waste or manure. Resulting in an ideal balance for rapid decomposition.

Next, chop up organic matter into small pieces.  Speeding up the rate at which it breaks down in your pile due to increased surface area available for microbes to work on.

Finally, adding moisture throughout the composting process. Helping to promote microbial activity by keeping temperatures higher than normal levels needed for effective decomposition.


Maintaining the Compost Pile

Proper management of the pile will ensure optimal decomposition and produce quality compost for your garden soils.

Managing moisture levels is essential for successful composting, as too much water will drown out beneficial microbes that help break down organic matter while too little can lead to dry and crumbly material that won’t decompose properly.

Maintaining, a moisture level between 40-60% throughout the process by adding water in small amounts when needed or covering piles with tarps during rainy periods to prevent them from becoming saturated.

Aerating your compost regularly helps provide oxygen necessary for microbial activity which speeds up breakdown of materials within the pile. Stir contents manually by turning over with a pitchfork every few weeks or using an automated system like tumbling drums which rotate periodically to evenly distribute air into the mix.

Lastly, keeping temperatures at ideal levels throughout the entire process is also key for producing quality compost; this means monitoring thermometers on a regular basis so you can adjust watering schedules if required.

By following these simple steps for maintaining your compost pile during autumn months, you can enjoy all year long healthy soil amendments made from recycled organic materials!


Conclusion

Composting in autumn is an ideal time to create quality soil amendments for use throughout the colder winter months ahead. The cooler temperatures are perfect for fostering beneficial microbial activity and providing oxygen necessary for successful decomposition.

Contact one of our lovely staff members to discuss which compost is the right one for you.


Get Ready for a Delicious Harvest – The Top Fruit and Veg to Grow During Autumn in Australia

Home grown Vegetables in a basket

Autumn begins on the 21st of March in Australia, and continues until May. Knowing which plants are best to grow during this period can make all the difference when it comes to success in your garden.Many popular fruits and vegetables are best planted at this time of year. Below we’ll cover some of the top fruits and vegetables you can plant, as well as some tips for tending gardens in autumn.  Get ready for a delicious harvest with the top fruit and vegetables to grow ‍during Autumn 

The Best Fruits to Plant in Autumn

Autumn is a great time for some of your staple fruits, including citrus. Popular options for autumn include:

    • Apples
    • Pears
    • Mandarins and oranges
    • Figs
    • Pomegranate
    • Rhubarb
    • Strawberries

The Best Vegetables to Plant in Autumn

Hearty root vegetables grow very well in the autumn and winter months. This is the best time of year to plant staples such as

    • Cauliflower and broccoli
    • Carrots
    • Onions
    • Leek
    • Lettuce and spinach
    • Cabbage
    • Snow peas
    • Swedes and Turnips

via GIPHY 

Planting Fruits and Vegetables

When it comes to planting fruits and vegetables, proper soil preparation is key. Proper soil should be loose and well-draining in order to allow oxygen to reach the roots of your plants. Make sure you add plenty of compost before planting as these will help provide nutrients for your plants while also improving drainage.

Additionally, test the pH level of the soil – this is important as different crops have different needs when it comes to acidity levels.

Frost is an important consideration — both as a risk, and also a benefit to certain plants.

Young plants are susceptible to frost damage. It’s important to plant fruits and vegetables early so that they can be mature enough to withstand frost when it sets in. Hessian covers and other protective items can be placed over plants to prevent frost and frost damage.

That said, certain fruits and vegetables actually benefit from a little frost. These plants react to the frost by producing extra sugars, which in turn results in a better flavour for the harvested food.

Hardy winter crops include broccoli, cauliflower, snow peas, parsnips and carrots. These will have a richer flavour if exposed to a little frost — that’s not to say bathe the plants in ice water, but you can leave them uncovered on colder nights without much worry.


Start Planting to Reap the Benefits

Planting fruits and vegetables in Australia during autumn can be incredibly rewarding with the right knowledge and preparation. Some of the most popular fruit and vegetable staples thrive at this time of year, such as citrus fruits and root vegetables.

Understanding what type of soil you have, what types of crops will work best for your climate, and how to properly store harvested produce are all essential considerations when creating a successful garden.

With a little bit of research ahead-of-time as well as regular maintenance throughout their growing cycles, you’ll soon find yourself with plentiful harvests from your autumn additions.

Reach out to our lovely staff to assist you with the right products for your garden.


What is the best sand to use in children’s sandpits?

childrens sand pit

Which sand to use for children’s sand pits.

Sandpits are a great way for children to enjoy the outdoors and get creative with their play. But it’s important to select the right sand for these types of activities.
White washed sand is an increasingly popular option. Due its cleanliness, lack of sharp edges and fine texture that make it much easier to keep kids’ clothes and hands clean after they have been playing in the sandpit. Let’s take a look at some of the benefits of whitewashed sand as well as tips on how to choose, store and use it safely so you can ensure your child has hours of safe fun in the sun.

Benefits of Choosing White Washed Sand

White washed sand is the perfect option for a sandpit. Its fine texture and lack of sharp edges make it much safer for children to play in than traditional sand. This can be gritty and uncomfortable on the skin.
The process of washing removes all impurities from the sand. Therefore it is completely clean and safe. Washed sand also provides better traction when wet. Therefore making building with moulds easier as well as lessening risks of slips and falls during playtime.

Hands and clothes will be noticeably cleaner after using white washed sand as well. Saving parents time, hassle, and growing water bills after each play.

via GIPHY

Picking the Right Sand

When it comes to picking the right sand for a child’s sandpit, there are a few key factors to consider.
Firstly, choosing a fine-grained sand is essential as this will provide the best traction and be gentle on their skin.
Secondly, ensuring that the sand is clean from any impurities or debris. It is important so that kids don’t get dirt or germs in their eyes or mouths while playing.
Finally, it’s important to avoid sharp objects such as rocks, shells or glass which can cause cuts and scrapes if stepped on accidentally.
White washed sand ticks all of these boxes – the sand is a fine grain, less likely to be abrasive, and triple washed for cleanliness. Therefore softer than traditional beach sands thanks to its extra fine texture so children get more comfort while they play. Plus you won’t have sandy messes everywhere after use!

Sandpit Play Safety Tips

To ensure children remain safe while playing in the sandpit, there are a few important safety measures to consider.
Firstly, it’s important to keep play areas clean by regularly raking or shovelling out any debris that has been left behind after previous use. This will help prevent any sharp objects from getting mixed up with the sand, and can also limit the chances of pests such as ants or cockroaches becoming a problem.
Secondly, keep the sand as dry. After use, cover the sandpit with a tarpaulin or other weatherproof cover. This will help to keep the sandpit environment clean and prevent mould from growing around the edges.
Finally, providing proper storage for any excess sandbox fill is essential in ensuring it remains safe and sanitary throughout its use. Look for an airtight container that can be sealed securely when not in use to prevent the sand leaking or getting dirty.

Triple White Washed Sand

When it comes to making sure children have safe and enjoyable playtime, white washed sand is the ideal choice for a sandpit.
With whitewashed sand, parents can save themselves the nightmare of washing tiny hands and clothes after every use. The sand doesn’t stick as much as other types, and is easy to gently brush off. This allows kids to get back into the house quickly without leaving a mess, and parents can save on water bills and time spent vacuuming up after their children.
What’s more, using white washed sand helps protect against unexpected sharp objects too. The fine particles create an even surface and tend to settle below foreign objects, so they stay visible and easily removed. Additionally, due to its carefully processed washing method there are no worries about impurities either so kids can stay healthy whilst playing in the sun!
Triple white washed sand is the ideal choice for your child’s outdoor sandpit. Browse our selection today, or ask our team about the best options and ways to fill your sandpit.

Using Lava Rocks Or Scoria As Mulch In Garden Beds

scoria as mulch in garden bed

Using Scoria as mulch in garden beds.

Lava rocks, also known as Drainage Scoria, are igneous rocks created when molten lava cools and solidifies. They generally have a rough texture with holes that were formed by gasses escaping during the cooling process.
Scoria rock is available in different sizes and shapes and can range from black to red in colour, depending on their chemical composition. It has many uses in gardening such as for landscaping, mulch, and drainage systems.

Why Use Lava Rocks in Gardening?

Scoria rocks are an ideal choice for gardening due to their excellent drainage and aeration properties.
The rocky structure of the lava rock helps to create air pockets which allow water and nutrients to penetrate deep into the soil, ensuring that plants receive adequate amounts of both.
Additionally, their porous nature prevents moisture from being retained and making the soil soggy or compacted.
Furthermore, because it is a natural material with good thermal insulation qualities it can help keep root systems at a more consistent temperature throughout the seasons.

How to Use Lava Rocks in Gardening?

When using lava rocks for gardening there are several steps that need to be taken beforehand.
Firstly, you should ensure that the area where you plan on laying them down is free from any obstructions such as weeds or roots so they have maximum contact with the soil beneath them.
Secondly, you should spread out an even layer of lava rock over your desired space before tamping it down lightly with a rake or shovel handle.
Finally, add organic matter such as compost or peat moss on top of the stones if desired before watering thoroughly until all particles have been moistened evenly across your garden bed’s surface.

Benefits of Using Lava Rocks in Gardening

One of the main benefits of using lava rocks in gardening is better soil drainage. The porous nature of this material allows water to pass through easily. Therefore allowing air to move freely throughout the soil, ensuring that plants are able to receive both without any hindrance.
This can be particularly beneficial for areas with heavy rainfall or poor drainage.  Ensuring from flooding and waterlogging.
Additionally, because these rocks hold little moisture themselves, they act as a natural weed suppressant. Creating prevention of weeds from taking over your garden beds by competing with them for resources such as light and nutrients.
Another benefit that comes from utilising lava rocks in your garden is its ability to regulate soil moisture levels.
By providing an even layer across the surface it ensures that evaporation takes place gradually.  Rather than all at once which can result in dry patches or overly saturated areas.
Furthermore, since lava rock does not degrade over time like other mulching materials such as wood chips or leaves.  It provides an effective barrier against topsoil erosion caused by wind or rain runoff; helping keep nutrient-rich topsoil where you want it. Nutrients directed right on to your plants!
Finally, when adding lava rock into your landscape design you will find that maintenance requirements become much less intensive overall. This is because of its long lasting properties.
As opposed to organic composts which require regular replenishment every season. This type of material has no need for frequent topping up. Therefore making it an ideal choice for those who may not have time for constant upkeep but still wish their gardens look neat and presentable year after year.

Conclusion

Scoria rocks are excellent materials for use in gardening projects due to their unique drainage and aeration properties.
Not only do they provide an ideal structure for water and air to penetrate deeply into the soil but also help regulate moisture levels more evenly throughout different seasons.
Since these rocks are incredibly durable it means that maintenance requirements become much less intensive over time. Therefore making them a great choice for those who may not have the time or resources available regularly for upkeep.
When used properly within your landscaping design you can create an attractive outdoor space.  This is both low-maintenance yet still aesthetically pleasing.
If you’re in need of any of the products mentioned in this article or relevant to your garden or lawn. Please visit our website here.

Prepping your lawn for Entertainment

Fertilizing the lawn with a lawn fertilizer

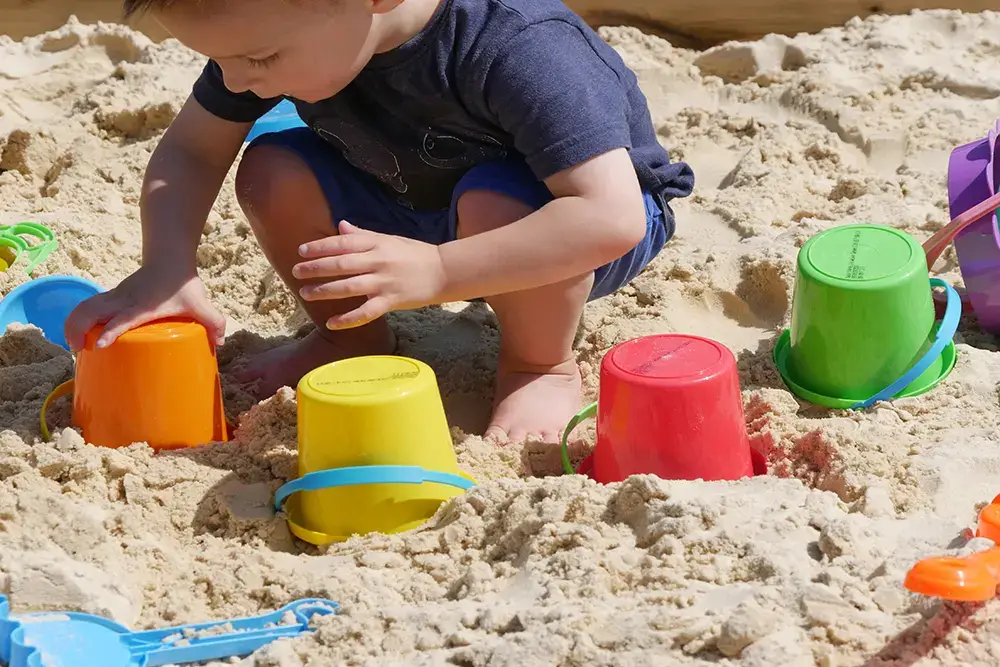
Are you ready to host your friends and family for a summer get-together in your backyard? Getting your lawn ready for summer entertaining can be a daunting task. But with the right techniques and quality materials, by prepping your lawn, create a beautiful, lush lawn that your friends and family will love to relax on.

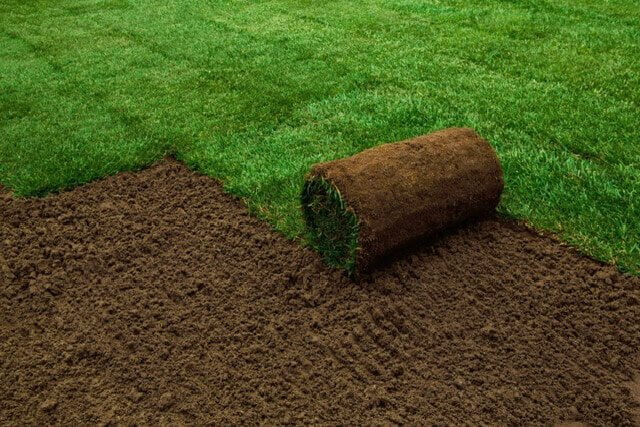
Whether you’re re-seeding an older existing lawn, laying down a new lawn or just sprucing up what you have, proper soil preparation and care is essential for a healthy, lush lawn.

To ensure your lawn is in top condition for the summer months ahead, you’ll need to use high quality top soil and sand to create the perfect foundation. Investing in quality sand and topsoil will help ensure that your lawn is the perfect backdrop for your summer entertaining. But don’t worry, we have all the top product recommendations for you included in this guide.

Are you ready? Let’s discuss how get your lawn ready for Spring and Summer, as well as the benefits of using the right materials.

Prepping your lawn


FOR RE SEEDING OLDER EXISTING LAWNS

Tip #1 – In cooler months, Cut existing lawn down close

If you are looking to get your lawn ready for entertaining during the warmer months, one of the most important steps is to cut down the existing lawn. This will help to level the grass out and create a smooth surface that is easy to work with.

To do this, you should use a turf cutter or an edger to trim down the grass as close to the ground as possible. Once you have finished trimming, you should re seed the lawn then spread some turf sand over the area.

Note: In warmer months, it is better to have longer lawn length to reduce the risk of lawn burn and browning.

Tip #2 – Lawn repair with Lawn Seed Blend

For a quick lawn repair and lawn patches – re seed the lawn with a sturdy general-purpose lawn seed blend. A 1kg box covers 50m2 of new lawn or 100m2 when over sowing or lawn repair.

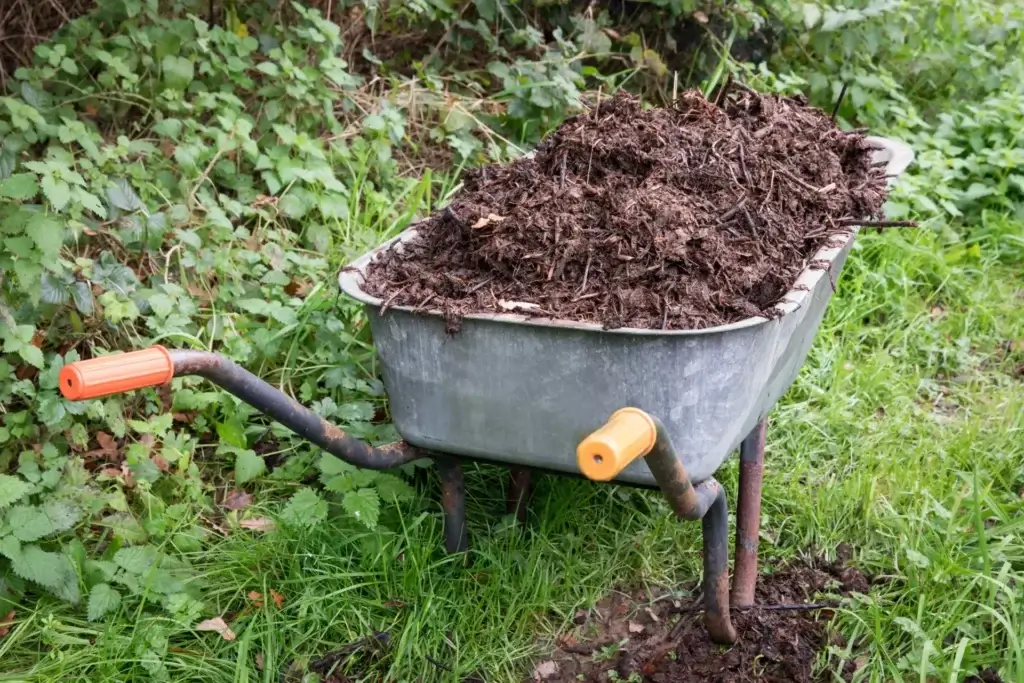
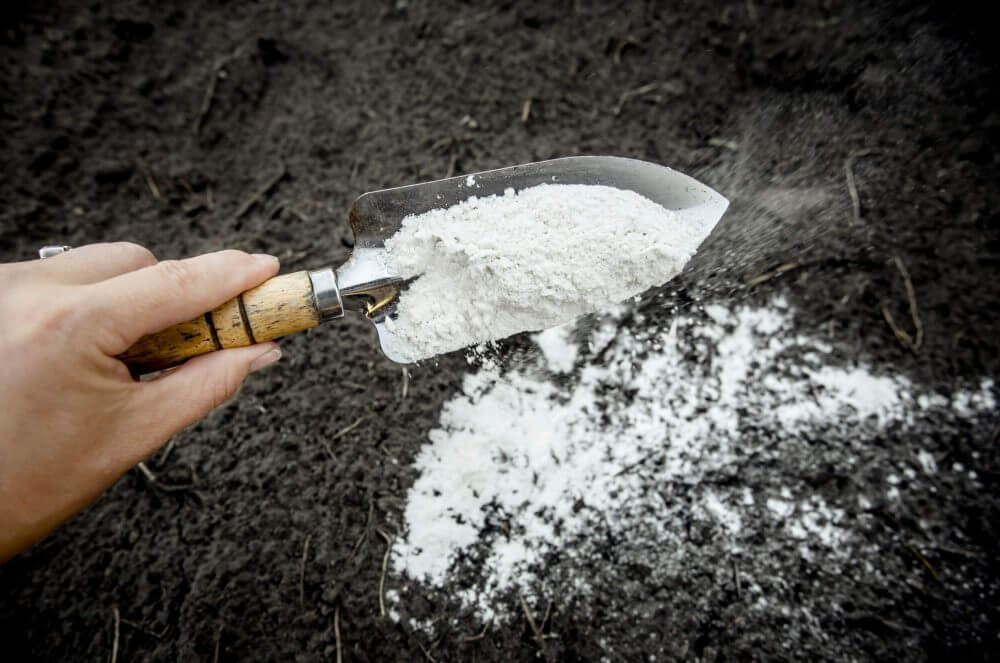
Tip #3 – Improve the look of established lawns by top dressing with a high-quality turf sand

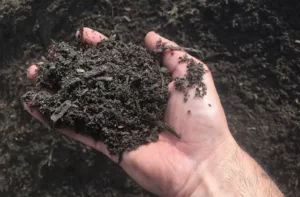
Turf sand is an important component of this process, as it helps improve drainage and increases soil porosity.

Turf sand is a coarse-grained, angular type of sand that’s often used in combination with topsoil or compost. It’s designed to provide good support for grass roots and help keep them from becoming compacted. It’s also great for helping promote aeration, which can be beneficial for the health of your lawn.

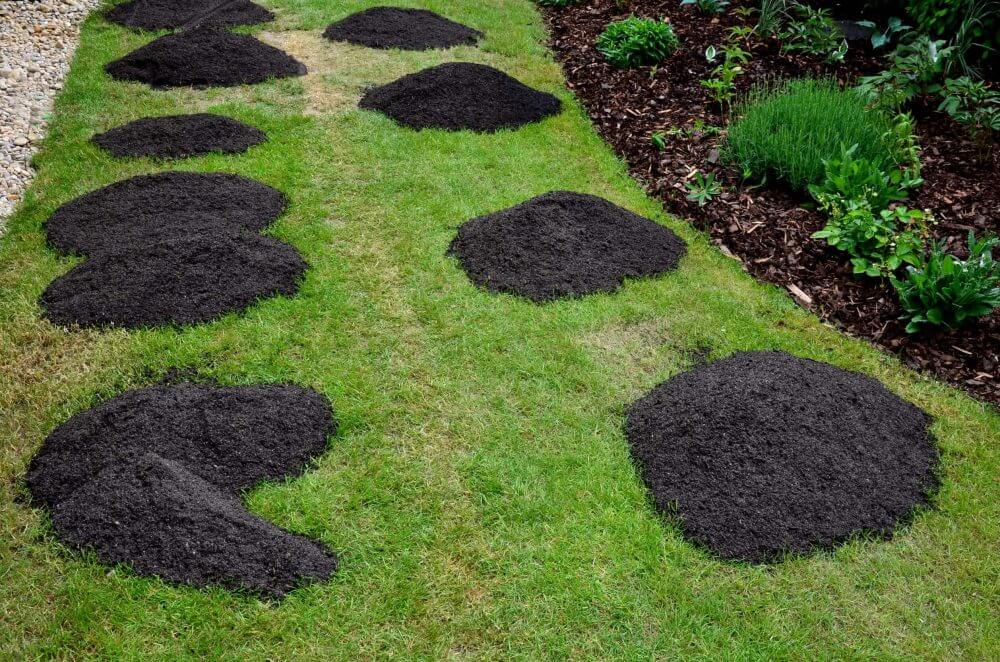
How to top dress your lawn

Lightly top dress with a 1cm depth of sandy loam turf sand. When laying turf sand, it’s important to be careful not to layer it too thickly. Laying too much will reduce the drainage capabilities and can lead to waterlogging, which can damage the lawn.

If you’re reseeding an older existing lawn, it’s best to incorporate some of the existing soil into the turf sand, as this will help to ensure that your lawn will take root.

Overall, turf sand is a great way to help prepare your lawn for summer entertaining.

The right sand will provide the perfect balance between water retention and drainage, giving your lawn the healthy, green look, it deserves. Make sure to use the right amount to get the most out of its benefits and enjoy a beautiful, healthy lawn all summer long.
Once your turf sand is in place, water it lightly and let it sit for at least 24 hours before applying fertilizer or other lawn treatments.

Ensure you keep your lawn well-watered and protected from foot traffic until the new growth is established. Your lawn will thank you for it!


FOR IMPROVING EXISTING LAWNS

Tip #1 – Don’t skip the fertiliser!

Spring is the time of year when lawn growth starts to really take off. Now is the perfect time to get your lawn in top shape for summer entertaining. One of the best ways to do this is to Fertilise with a professional grade slow-release fertiliser to help with both growth and resilience of your lawn.

Applying fertiliser and other soil enhancers will ensure optimal growth and durability of your lawn. Doing this will create a lush and inviting outdoor space for all your summer entertaining needs!

Tip #2 – Keep your lawn hydrated

Keep your lawn watered in spring, checking it once per week.  Spraying the lawn with a wetting agent will help to prevent the roots from drying out


BEFORE ENTERTAINING

If you’re just days out from entertaining, there are some last minute fixes you can consider. With the right technique and a bit of TLC, you can easily get your lawn ready for summer entertaining in no time!

Tip #1 – Garden Fertiliser / Foliar Feeding

The process of foliar feeding involves directly fertilizing your grass by spraying nutrients. For a greener and deeper look to your lawn, a foliar fertilizer can be applied such as Lawnporns green light.

Tip #2 – Green Light

Green light is another ideal solution to use before entertaining of a bbq or when you want your lawn to look at its best. This process results in quick growth and optimal nutrient absorption for a fresh green finish.


Here’s what you need:
Lawn Seed Blend / Lawn Repair
High Quality Turf Sand
Garden Fertilizer / Soil Enhancers
Green Light

Now you’re armed with all the essentials for creating a lush, healthy lawn for your summer entertaining needs. When it comes to preparing your lawn for the upcoming season, following these tips will ensure that your grass will be the perfect backdrop for all of your summer festivities.

If you’re in need of any of the products mentioned in this article or relevant to your garden or lawn. Please visit our website here.

Read about 6 steps for your landscape design

Which Crushed rock to use underneath pathways or concrete?

Lay pavers on a bed of crushed rock

Before laying pavers or pathways, it is important to prepare the ground with a firm base of crushed rock gravel.

Without a firm sub base, your pathway or installation of Synthetic turf or pavers could  become unstable and uneven.

The types of crushed rock gravel used to make a firm sub base are B Grade, Recycled concrete, Pavement base and Road Base.  Use these crushed rocks in different applications as they all vary.

B Grade Crushed Rock

Firstly, 20mm B grade is generally used by landscapers as a base underneath concrete driveways or as a filling for potholes and driveways.

Use Recycled Concrete as an alternative, if the weather is too wet

B Grade crushed rock is a Class 3 rock and forms a firm base over soil, sand and soft surfaces.

Use this rock under blue stone dust for a base underneath synthetic turf.

via GIPHY

Recycled Concrete or Pave Base

Next, Concretors and landscapers use Recycled concrete

as a base underneath concrete or pathways and provides a firm sub base for your project.

Made from building materials and may contain other items such as broken glass or wire from the building sites.

For this reason I recommend as a sub base and not a topping on the surface.

Another name for Recycled concrete may also be known as pavement base, although Pavement Base is generally a cheaper option.

A Grade Road Base

Lastly, use A grade Road Base in road making projects and pipe bedding as it compacts hard.

Road Base compacts well and makes a great base for underneath sand for paving or long driveways.

Although Road Base is also a Class 3 rock it is more expensive than the B Grade crushed rock.


via GIPHY

See the full range of our pavers here

Choosing the best soil to reduce water usage in your garden

Water saving soil. Which soil is best for your garden.

Reduce water usage in your garden by using the right soil

Different soils vary greatly in both nutritional properties and water holding capacity.

Depending on the type of garden plants and their nutritional needs determines the type of soil needed so they can thrive.

Soils vary from the thick clay, mountains soil, soil with a lot of organic matter, free draining sandy loam soil through to a sand or silt.

The choice of soil depends greatly on the area in which you live and the plants you grow.

What is the best soil for both improved water holding capacity and nutrients to feed the plants?

The best soil choice is usually a good sandy loam soil as it has a mixture of a certain amount of free draining properties, nutritional properties and have some water holding capacity for drier climates.

Below is a description of different soils, their properties with pros and cons in reducing water usage in your garden.

About Clay Soil

Clay soils play a very important role in some areas such as the Dandenong Ranges in Victoria.

Clay soil is very thick in texture. It can attract important nutrients to specific plants and holds a lot of water.

Clay soil can water log the roots of plants and in dry weather the clay soil can become very hard and compacted for plants to thrive.

It is not suitable for the general garden in the Casey or Frankston area.

Clay Soil.

About Organic or Blended Soil for water saving soil

Blended soil contains organic plant material and other nutrients such as chook manure and sawdust shavings.

The plant matter makes for a slightly lighter and fluffier consistency and the organic matter provides nutritional value and water holding capacity which can save on water usage.

It can be rich in nutrients and is a popular choice for vegetable gardens.

The manures and phosphorous can be too strong for the sensitive roots of Australian native gardens. Therefore this soil is not recommended.

Although this soil contains natural organic ingredients, it is not a certified Organic product.

Superblend top soil with organic matter.

About Sandy Loam Top Soil or Screened top soil

Our Sandy Loam soil is also called Screened top soil.

It is a screened sandy soil which improves moisture retention and therefore minimises compaction.

Sandy loam top soil is the preferred soil for Lawns and general garden beds for gardens in the Cranbourne Casey area.

Sandy Loam Screened top soil. Water saving soil

About Turf Sand

Turf sand is excellent for top dressing existing lawns.  It needs to be lighter free draining sandy soil which has limited water holding capacity.

Turf sand or soil for top dressing.

About Tailings

Tailings are unscreened soil which falls to the side during the screening process.

It is a lumpy soil so it may contain other products which have not been removed in the screening process.

It is used as filing areas and is not recommended as a top soil.

About Unscreened soil or Fill

Completely unscreened soil which is not recommended as top soil may contain items and may be dangerous to walk on.

In summary:

The Sandy Loam screened top soil and the organic blended soil are the two soils which have nutritional value, a balance of good drainage in wet weather and water holding capacity for drier climates. These soils are perfect for your front or back yard.

Other posts

How to lay pavers using crushed stone dust instead of sand

how to lay pavers on crushed rock
  1. Before laying pavers, good preparation of a site is important and there are a few options to go with.
  2. A firm base of crushed rock with a layer of crusher dust or stone dust.
  3. Blue Stone Dust or Gold Dust are a great alternative to concrete sand for laying pavers.
  4. To lay pavers, dig out your area, make a firm base, top with crushed dust or sand, use a string line and rubber mallet, lay your pavers carefully.                                          See the instructions below.

How to lay pavers:n

First, lay pavers using crushed stone dust as an alternative to sand.

Dig out your area

Then form a solid foundation by digging out and leveling off the area you are going to pave.

Make a firm base

Next leave enough depth for a generous layer amount of 20mm B grade crushed rock.   The crushed rock will stabilise the ground and stop the pavers from sinking.

Use a compactor to make sure this sub base pacts firmly.

compact the base before paving

Top with Crusher Dust

Finish with a finer layer of Blue Stone crushed dust and level off with a screed.

The pavers will be placed on top of this layer of crushed dust.

Use a layer of Stone dust instead on concrete sand.

Use a String Line

Afterwards a string line to help you to place your pavers in the right location.

use stringline for paving

Lay the pavers

Lastly the pavers can be laid when the base is firm and level.

Then lay the pavers one at a time, using a string line to keep them straight.

Using a rubber hammer or mallet to knock the pavers down into place.

Lastly this will ensure the surface is level and smooth to walk on.

Use a rubber mallet

There are many ways to lay pavers and this is just one very popular option.

Well laid pavers can endure the test of time and look their best for many years to come.

Kennedy’s Cranbourne deliver landscape supplies to the areas of Botanic Ridge, Clyde, Langwarrin and surrounding suburbs.

Find our full range of pavers here:

Landscape design

Cath

How to use soil conditioners

planting in quality soil

Soil conditioners are added to the soil to improve the effectiveness.  There are a wide variety of soil conditioners which perform different functions.  Some soil conditioners can sweeten acid soils while others break up clay-based soils to improve soil structure.

What are soil conditioners

Soil conditioners improve nutrient levels, water retention and soil structure.  A wide variety of soil conditioners include products such as Lime, Dolomite Gypsum, Blood & Bone and Compost just to name a few.  Each has a different function and can be used in a number of ways.

Lime

Lime is a naturally occurring mineral used to sweeten sour or acidic soils.  It helps to provide calcium to the plant roots, which is an essential nutrient and raises the PH and assists in releasing nutrients trapped by the acid soil.

Lime is great for use when growing beans, peas, cabbage, cauliflower, lettuce, sweet peas and tomatoes. Work 125 grams per square metre into soil before planting.  For lawns, Spread evenly 125 grams per square metre and water in well.

Do not add lime if you are planting acid loving plants such as azaleas, rhododendrons, camellias or magnolias.  Some natives are also not suitable to be treated with Lime.

conditioning soil with lime

Gypsum

Natural Gypsum is used for breaking up heavy clay soils that cake or crust therefore improving drainage and aeration.  It can be used twice a year and regular use will improve the structure of the soil.  Gypsum is not acid or alkaline so will not affect the natural PH of the soil in any way.

Gypsum can be used on lawns in Spring and Summer. Spread 125 grams per square metre, rake in and water well.  The lawn may initially turn yellow but this will disappear with watering and feeding.

For new garden beds, apply 1kg per square metre and work into the soil before planting.  Apply Gypsum to the top 20 cm of established garden beds.

Blood & Bone

Blood and Bone is both a fertiliser and a soil conditioner and improves soil drainage, aeration and water retention.  It is a pure source of Nitrogen, Phosphorous and Potassium.  Spread 50grams per metre prior to planting flowers and vegetables. Blood & Bone is also beneficial for Fruit and Citrus trees, roses and lawns.  Apply 100 grams per square metre to lawns in August and March. Rake and water in immediately after application.

Dolomite

Dolomite raises the PH and assist releasing Calcium and Magnesium trapped by the acidic soil.  Use dolomite in garden beds and lawns. Spread 250 grams of dolomite per square metre in garden beds and work into the top 7 cm of soil.  Add 125 grams per square metre to lawns and water well every second year.

Do not use Dolomite on acid loving plants such as Azaleas, Camellias or Magnolias or some Australian native plants.

Composts

Mix Composts are soil in to the soil to improve soil structure and nutrients.  Compost encourage microbial activity which benefits the health of the soil and improves its water holding capacity.

Are all soils or composts the same?

Are soils the same

Which soil or compost is best

We often receive the question “Which soil is best for my garden?” or, “Should I add compost to the garden soil?”  Finding the answer to this depends on the type of garden or lawn you plant.  Certain soils work best in specific types of garden beds. Read on to learn which soil or compost is best for your garden project.

Which soil is best?

Lightweight, fluffy and aerated soils prove to be the best. Trees require sandy loam to enhance root growth.  Native plants & lawns also thrive in sandy loam.  Vegetables and flowers prefer a nutrient-rich soil with more structure and water holding capacity.

Lawns

To start, prepare fresh lawns and instant turf with a screened  sandy loam top soil is best to help the roots establish.

garden soil in hands

Vegetable Gardens and Flower Beds

Vegetables and flowers gain benefits from soil because it provides structure and nutrients.  Super blend enriches the soil with added aged fowl manure and offers more water holding capacity.   However, you can also incorporate other types of composts which can also be added to garden soil.   Mushroom Compost, Revive compost or Diggers Compost are just a few examples.

Australian Native plants

For Australian Native Plants, use free draining Sandy Loam.  Australian natives flourish in a lower nutrient, free draining soil, as excessive nitrogen can harm the sensitive root systems.

Which compost is best

Composts

Composts serve as soil conditioners and stimulates microbial activity. You can make smaller quantities at home using kitchen scraps with fresh and dry garden waste.

Furthermore, bulk composts come from different industries such as mushroom farms, the dairy industry and gardening industry.

Mushroom Compost

The mushroom growing industry produces Mushroom Compost by mixing it with straw and other growing mediums for mushrooms.  For example it can provide plants like roses with a significant boost in spring.  Specifically mix mushroom compost into the base for a naturally nutritious lift.

Revive Compost

Then, Revive compost originates from the dairy industry.  You can mix this compost into the base to add structure and nourishment.

Diggers Compost

Diggers compost is a dark organic garden soil conditioner.  This compost is arises from garden trimmings including leaves and branches. It uses a controlled batching composting technique.   Additionally, it can be added to all soil types from sandy loam to clay.  Lastly, Diggers Compost has gained popularity as a compost choice for vegetable gardens and flower beds.


Read more 4 simples steps for lawn care in spring

How to Spend more time in Nature while staying at home

As we are spending more time at home indoors, its never been more important to connect with nature.

There are many ways to connect with nature both inside our home and in our garden.

Health benefits of nature

Improved sleep & relaxation therefore lowering stress levels and improved immunity are common benefits of spending time in nature.

Here are a few simple ideas to increasing your exposure to nature and making the most of time at home.

outdoor yoga in nature

Outdoor workouts

Activities such as  yoga, meditation and simple stretching can be done outside on the lush green lawn.  

With so many gyms closed, outdoors is great place to continue the activities.

Finding green spaces with fresh air can benefit the mind, body and soul.

outdoor yoga in nature

Gardening

Planting vegetable gardens have become very popular throughout the COVID-19 pandemic.

Weather your potting up indoor plants, or planting a tree, getting your hands in the earth, gardening can be a satisfying activity

For many people gardening is a relaxing pastime. It can soothe away stress built up over the day.

Decorating a patio

Prepare your patio with relaxing chairs, BBQ and potted plants. Create an outdoor retreat to bask on warm sunny days.

A tropical atmosphere can be created with large leafed plants in pots, relaxing day beds or chairs and even a hammock if there is room.

A thoughtfully decorated outdoor space can give you that resort style feel which calms the senses. Step outside into this space and enjoy anytime at home.

Earthing

When ever your on the grass, slip off your shoes and feel the cool grass and the earths natural energy underneath your bare feet. The simple act of Earthing, helps us lower our stress levels, improve sleep. 

themed garden surrounded by nature

Design a themed garden

Weather it be an Australian native garden to encourage birds, a tropical garden or a drought tolerant garden, choose a design that would encourage you out to spend time in. 

As we are spending more time at home and traveling less, your preferred resort styled garden in which you would enjoy spending your stay-cation to relax and unwind.

Indoor Plants

If outdoor space is limited, bring the benefits of the garden indoors. There are so many choices of beautiful and hardy indoor plants. The benefits of fresher air, a soothing environment, and beautifying the decor, indoor plants have some serious health benefits for us.

A well designed garden ensures we get the physical and emotional benefits from nature.


Making your own Garden Compost

Making your own compost.

Getting outside and growing clean vegetable and plants is increasingly important as we care for our own health and vitality.

Compost increases the water holding capacity to the soil, adds nutrients and improves soil structure.

Home made Compost is a long-held tradition for many gardeners and is an essential component to the health of the soil we grow plants in.

Ingredients for making compost

Add one part of dry or brown ingredients to one part of fresh or green ingredients.                                                  

If  compost pile is smelly, use more dry or brown ingredients.  Keep moist, not water logged.


adding fresh ingredients to compost

Fresh compost ingredients

Add fruit or vegetable peelings and small chopped plant clippings to the compost.

Fresh ingredients add nitrogen to the pile.

Smaller pieces are easier and faster to compost.

Dry compost ingredients

Dry or brown ingredients add carbon to the compost and help to aerate the pile.

Add dry leaves, shredded paper, cardboard, straw and egg cartons.

Dry ingredients add carbon to the pile.

Use Equal parts dry ingredients to fresh ingredients.

Sprinkle with water to moisten the dry ingredients to speed up the composting process.

Add Manure compost

Blood & bone, aged chicken, sheep or cow manures are beneficial to the compost pile as they are rich in nitrogen.

Nitrogen is beneficial for the health of the compost and plant growth.

Manures help to heat up the pile, speeding up the composting process

Coffee

Coffee grounds added to your compost or soil makes a great slow release fertilizer.

Tea leaves can also be added.

tips for making compost

Tips for making compost

It is best to have a couple of compost bins on the go.  One bin for filling while the other is full and composting.

Position the compost bins in a shady spot with direct contact with the soil.

Keep the compost moist but not water logged. If the pile is too wet, add more brown ingredients.

A commercial aerator will help to keep the ph. correct. A hand full of Lime once a month can be added.

The compost process takes around 8 – 10 weeks in warm weather

Making your own garden compost is a rewarding activity.

For those who do not want to wait, there are commercial composts on the market such as Mushroom compost, Diggers Compost, Revive or a blended soil with compost added.

Which ever way you go, enjoy seeing your soil and plant health improve throughout the growing season.

Outdoor Eco-friendly Cleaning Solutions for the Garden

Eco friendly outdoor cleaning

Effective and safe eco-friendly cleaning products are fast becoming mainstream as we move away from using too many toxic chemicals in our house and garden.

Looking out for the health of our pets, the environment and our family has fast become a priority for many of us.

Why use eco-friendly cleaning products?

Eco-friendly or green cleaning solutions can be as effective than more toxic products. Moving away from the many toxic products which is ultimately better for our health and the environment we live in.

What ingredients to use for eco-friendly outdoor cleaning?

A few ingredients for safe, green eco-friendly cleaning products are baking soda, vinegar and ammonia. These ingredients can be easily found in the home to make recipes for cleaning bird droppings, bricks, decking or outdoor furniture.  Some fast acting cleaning recipes are below.

1: Clean bird droppings

Bird droppings can be quickly removed by pouring full strength Apple Cider Vinegar onto a cloth before wiping clean.

2: Cleaning bricks

To remove calcium on brick or limestone, spray a blend of 1/2 white distilled vinegar and 1/2 water. Let the mixture set and do its work.

safe eco friendly cleaning of decking

3: Clean decking

Remove mildew from outdoor decking by adding 1 cup of ammonia, 1/2 cup of white vinegar and 1/2 cup of baking soda to 4 liters of water.  Scrub with a decking brush then rinse with water when clean.

4: Clean wooden garden furniture

Use the deck cleaning recipe with a soft sponge to apply mixture. Rinse the furniture with water when clean.

eco-friendly cleaning of outdoor plastic furniture

5: Plastic furniture

Remove dirt build up and mildew on plastic furniture by spraying full strength white vinegar and wipe down with a sponge.  The vinegar will also help to prevent mildew reappearing for a while.

These eco-friendly cleaning solutions are both effective and simple recipes to make.  If making up your own solutions are not your thing, there are now a good choice of quality commercial eco-friendly cleaning products readily found on the retail shelves.


Managing drainage in a flooded yard

rain water flooding the backyard

Excessive rain over the wet season can often make if difficult for water to drain away at the usual pace.  To save your landscaped garden from erosion, it is important to improve the drainage problems in your yard.  The severity of flooding determines which drainage solution to use.

For superficial drainage, a spoon drain is best to direct the flow of water away from the rain soaked areas.  Installation of agricultural pipes like the 90 mm slotted agi pipe or the flexible agflow pipes are better for water which has soaked into the ground.

Managing drainage for a flooded yard can be done using either a spoon drain for surface water or using a 90 mm slotted PVC pipe or Ag flow with or without a geo-fabric sock to keep the drain free of dirt and silt.

What is a spoon drain?

A spoon drain is a shallow spoon shaped channel which redirects excessive water sitting on the grounds surface. It is the easiest drainage solution to redirect surface water.

Drainage in paving and concrete

Hard surfaces in outdoor areas such as paving and concrete need to have a fall to allow for water runoff.  Adding a reln channel and grate is a designer solution that covers the drains which blend into the paving or concrete areas.

The channel is connected to the storm water system which allows water to flow out to street gutters or drains.

drainage solutions with paving

What is agi pipe used for?

An agi pipe is a slotted PVC pipe which is placed into a trench and back filled with 10 mm or 20 mm gravel, drainage scoria or sand.  Excess water that has soaked into the ground, seeps into the trench, through the rocks and is drained away through the slotted PVC pipe.  The flexible agflo pipes are also a good choice for drainage. Sometimes the Agflo is covered with a Geo fabric sock that keeps the dirt and silt out of the pipe.

What to know about agricultural pipes

Agricultural pipes need to be able to flow away downhill and installed to the direction of water-flow.  The pipe needs to be kept at least 1 metre away from the house and you should never run slotted pope drains under the house as this may cause damage.

Water drainage in grass

Drainage in retaining walls

When constructing retaining walls, the installation of groundwater drainage is recommended using agi pipe.  This will help to prevent damage to the wall and formation of sinkholes in the soil above.  Geo-textile filter fabrics need to be installed with the drainage system to prevent soil erosion.

Improving drainage problems in your yard will save your yard and your landscaped garden from erosion.

For responsible water disposal, water must be directed to a disposal point acceptable to your neighborhood and your council.

Remember, If in doubt, always seek advice or services of a registered plumber.

drainage solutions
drainage solutions

Which garden tools do I need?

wheelbarrow with garden tools

With so many different types of garden tools available, choosing the tools which will be the most used and necessary to set up your garden tool shed can be a difficult decision.

Essential garden tools

There are a few garden tools which are essential for any gardener to start their collection. The tools to begin with are a shovel, spade, wheelbarrow, hoe, fork, rake and garden secateurs.  Quality garden tools are a must which, in the long term will save you time, money and help to ensure your time in the garden is most enjoyable.

Spade

A spade is not used for digging and is different to a shovel.  Generally the spade has a larger scoop and is used for moving a pile of mulch, soil and other bulk products. A spade with a very sharp edge can also be used for edging lawn. Stainless steel spades are lighter and easier to use than fully forged steel spades.  A small hand sized spade is also very useful for digging and planting small flowers, veges and shrubs.

Shovel

A shovel blade is typically curved and usually angled forward for digging where the spade blade is not.  The shovel generally has a long straight handle for digging holes which allows for more leverage needed.

Wheelbarrow

A wheelbarrow is one of the most useful items for carrying tools, garden products and other items around. This makes the garden jobs much easier and saves your back.  Make sure your wheelbarrow is sturdy with a solid bucket and wheels are large enough to hold your tools.

Essential backyard tools

Rake

Choose which garden rake to the job you are doing.  A heavy-duty landscapers rake is used for larger landscaping projects such as leveling soil, driveways and heavier product.  A light weight rake is generally only used for raking things such as leaves and grass.

Fork

A fork is for cultivating the ground in areas like a vege patch.  A potato fork is a wider fork with more prongs to fork for potatoes and other root vegetables.

Garden Secateurs

Garden secateurs are also called pruning shears and need to feel comfortable in your hand when in use.  Good garden secateurs need to be strong enough to prune shrubs and hard branches up to two centimetres.  It is important that they have a high-quality blade which keeps a sharp edge.

Stocking your garden shed with just a few of the most useful tools will go a long way when its time to get out for planting, pruning and building your next garden bed.

Which garden tools do I need

Re-potting outdoor plants using potting mix

repotting outdoor plants using potting mix

Re-potting outdoor pot plants is important for the continuation of growth and health of the
plant. Using the right container and the best potting mix will save on future maintenance
issues, giving the plants a better environment for growth.

There is a little more to it than just grabbing a larger pot and some old potting mix from the shed.
A well cleaned pot and a quality potting mix will make all the difference.
The most common questions we hear regarding potting mixes are: “Aren’t all potting mixes
the same?” or “Does it matter which potting mix to use?”

How outdoor plants respond to re-potting depends on both the choice of pot and the
quality of the potting mix.
Although potting mixes may look the same, the ingredients inside the bag can be very
different. Depending on what type of plants you are planting, and their requirements in soil
structure and nutrients, a suitable potting mix will be required.  For most outdoor plants, a
high-quality premium mix is recommended.

Potting mix for outdoor plants

Quality potting mixes comply with the Australian Standard requirements of AS 3743
for a Premium grade potting mix.
Certified Australian Standard potting mixes have all been tested and approved for the following specifications:

  •  Water holding capacity of the potting mix
  •  How well the mix drains
  •  Water absorption
  •  The nutrient levels
  •  Ph levels

Premium potting mix

It is important that the potting mix is certified to the AS 373 Australian Standard and contain
the red ticks of approval.
A certified Premium potting mix contains slow release fertilizer and a re-wetting agent. This
potting mix lasts longer than a general-purpose mix, therefore needs less maintenance. This mix can be used for most plants except specialty plants such as orchids or azaleas.

Specialty plants

A specialty potting mix should be used for certain plants which require specific needs from
their mix. These specialty mixes are specific for Camellia or Azalea, Orchids, seed
germination and bulbs such as the African Violet.

repotting outdoor plants
re potting outdoor plants

How to re-pot your plants

  1.  Make sure the plant is well watered up to one day beforehand
  2.  The cleaned replacement pot needs to be between 5 to 7cm wider than the old pot.
  3.  Fill a third of the pot with potting mix.
  4.  Gently remove the plant from the old pot by tipping it upside down and tapping the
    sides.
  5.  Place the plant in the new pot and fill the pot with potting mix.
  6.  Water generously and add extra potting mix if necessary.
  7.  Place the freshly potted plant in its optimum position.
  8.  Water plants when required.
  9.  After 3 to 4months, a slow release fertiliser may be required.

With a little bit of TLC, using the right ingredients, your outdoor potted plants will look their
best throughout the year.

WHAT TO PUT UNDER FRESH INSTANT TURF BEFORE LAYING

Preparing the ground for instant turf

The success in establishing freshly laid turf depends greatly on both proper site preparation and soil preparation.  Spending time on preparation will help to ensure the best growing conditions and establishment for your freshly laid instant turf.

HOW TO PREPARE THE SITE FOR INSTANT TURF INSTALLATION

Prepare the site with the following steps will ensure successful establishment for your instant turf:

  • Clear the site from weeds, rocks and sticks. 
  • Dig the surface to a depth of 10-15 cm
  • Add quality sandy loam soil of around 10 cm making sure the soil level is 3cm below paths and driveways.
  • Slope the soil away from buildings to avoid flooding.
  • Rake the soil for an even surface
  • Apply quality lawn starter fertiliser
  • Instant turf can now be applied.

SITE CLEARANCE

The first step is to clear the area of any debris such as rocks, sticks, weeds or stones.  Dig the area evenly to a depth of around 10-15 cm making sure that the soil slopes away from the house. This will improve drainage therefore reducing wet patches and flooding near buildings.


Preparing the site for artificial turf installation
Preparation for instant turf installation

SOIL PREPARATION

It is important to prepare the soil properly before laying new lawn.

Add a good quality top soil around 10 cm in depth.

A sandy loam top soil is best and can be top dressed with turf sand if required.Make sure the soil level is 3 cm lower than any paths or driveways.

This will ensure an even surface for mowing after the turf has been laid.

RAKE THE SOIL

Rake the soil so the surface is free of any pits or rises.  This will give you better results for an even lawn surface and easy mowing.

Next, add a good quality lawn starter fertiliser to the soil before laying the fresh turf.

When you are happy with the appearance of your soils surface, you may then apply the correct instant lawn for the weather conditions for the area for which you live.

Preparing the ground for Artificial grass installation

blue stone dust underneath synthetic grass

Artificial grass has been a low maintenance option for those who love the look of grass but don’t want to spend time mowing or maintaining it.

Before installing synthetic grass, it is essential to have the area prepared properly.

With the right ground preparation, synthetic grass will look amazing and feel soft underfoot.

Remove Lawn

Dig out to remove existing lawn and debris. Dig down to a depth of around 10cm. This allows enough room to apply the sub bases.

Best sub base for artificial grass

1: Apply 5 cm of 20 mm crushed rock as the first sub base layer and compact.
2: Spread another 5 cm of a fine crusher dust such as Blue Stone Dust for a smooth, softer feel under the grass
3: Smooth and level the crushed dust so the artificial grass will be smooth.
4: The area is now prepared for the application of the artificial turf

Applying the sub base

Lay around 5 cm of the 20 mm crushed rock first and compact down firmly. This layer will provide a firm
base and keep the levels from dropping or forming low patches.
Next, lay another 5 cm of fine crushed dust such as Blue Stone Dust and smooth out the surface. The Blue Stone Dust is a
finer product and will feel smoother and softer walking underfoot when the artificial turf has been laid.

Synthetic turf
Synthetic turf

Smooth and level

Use the back of a rake or piece of wood to smooth and level the area.  It is important to get this step right as a smooth sub surface will give the laid artificial turf a smooth soft appearance.  The area is now prepared for the application of synthetic grass and kiln dry sand.

Apply between 6-8kg of kiln dried synthetic sand per square metre of Artificial grass for a natural look.


Choosing the right mulch for your garden

What is the best garden mulch to use
Mulch is so important to the health of both soil and plants. It has many functions and benefits in the garden.  Deciding on the right kind of mulch for your garden depends on what types of plants you are growing and their specific needs.  The types of mulch can be broken up into three categories. These categories have differing benefits to both the soil and the garden plants.  They are called feeding mulches, woody mulches and hard mulches.

What is the best garden mulch?

Nutritional mulches such as Sugar Cane mulch and Pea Straw are best suited to shallow rooted plants feeding vegetables and flowers.  Woody mulch breaks down more slowly which is suitable for garden shrubs and trees.  Hard mulches like pebbles, scoria or gravel offer no nutritional value. They are suited to both drought tolerant plants or those with little nutritional needs.  Liquid fertiliser can be applied to plants that are hard mulched from time to time. 

Feeding mulch

Mulches that break down quickly, promote worm and microbial activity, nourishing and conditioning the soils structure.  This type of mulch is perfect for the vegetable garden and other shallow rooted plants.  Mulches such as Lucerne hay, Pea straw and Sugar cane mulch fit into this category.sugar cane mulch

Woody Mulch

Woody mulches come in an assortment of size and textures.  Fine woody mulches will tend to break down faster while the thicker wood chips are very slow to break down.  These mulches are recommended to be applied up to 10 cm thick to retain moisture and regulate soil temperature.  Woody mulches can be used in garden beds amongst flowers, shrubs and trees where the roots grow deeper into the soil.wood chip mulch

Hard Mulch

Hard landscaping mulch such as pebbles, scoria or gravel does not break down or feed the soil at all and is mostly decorative.  This mulch does not need to be topped up each year, therefore is low maintenance in the long term.  Hard mulches can be used in low nutritional gardens or drought tolerant gardens.With careful consideration, choosing the right mulch for your garden can give your plants the best start, creating an enjoyable space to relax and unwind around your home.

How to clean new landscaping garden rocks and pebbles of silt or dirt

How to clean landscaping stone or pebbles

When you receive your first load of rocks or garden pebbles, it is possible that they may be covered in a fine film of silt or have a dirty appearance.  As they are a natural product which comes from the quarry, the silt may have settled in the pile and covered the stones at the bottom of the pile.  With a few simple maintenance steps your pebbles and garden rocks will look amazing for many years to come.

Cleaning the landscaping rocks or pebbles with a broom and a spray hose is usually all you need to achieve fresh new look required for your garden beds.  Rain also can be enough to wash away the silt from the surface of the pebbles.

Lay your rocks into position

First, lay your rocks or pebbles in the garden beds as you would like them.  This will save any double handling and therefore easier cleaning of your stones.

Use a broom

Hard brushing the surface of the rocks or pebbles with a broom will scrub away any excess, therefore thinning the dry silt layer which are covering the stones. Do this before hosing or applying water to the stones.

Water with a spray hose

Using a pressurized spray hose, will blast water in between the rocks to loosen the silt or dirt.  Washing the stones will bring out the best of the colours in the pebbles.

The water may look quite muddy but will wash away fairly quickly, cleaning the gravel or stones.

There is no need to hose your pebbles or rocks if rain is forecast, as the rain will naturally wash away the silt from the stones.

Maintenance

Over the seasons, you may notice some leaves or twigs have fallen over the surface of your landscaping stones.  A simple blast with a blower or garden vac will remove the layer of fallen debris to keep your garden looking its best.

With a very small amount of maintenance, landscaping your garden with rocks, pebbles or gravel will continue to keep its appearance and your garden will look great for many years to come.